Tuesday, February 28, 2012

Chocolate Surprise Cookies


I don't know why I even ask Dennis what he wants for a weekly treat because inevitably his response involves chocolate or marshmallows.  I thought I had exhausted most of the possibilities to put these two flavors together, but when I saw this recipe from Martha Stewart I couldn't resist trying it out.

This recipe might look a bit complicated (I had a bad experience with frosting once) but it’s fairly simple and the final result is a knockout.  I worried that the cookie might be too sweet, but it provides a perfect contrast to with the marshmallow and chocolate frosting.  I love the fact that this recipe can be adapted to your tastes also.  If you don’t want marshmallows, maybe throw in a peanut butter cup or Hershey kiss.  They are called Surprise Cookies after all!

Chocolate Surprise Cookies (from Martha Stewart)

1 3/4 cups all-purpose flour
3/4 cup Dutch-process cocoa powder
1/2 teaspoon baking soda
1/2 teaspoon salt
1/2 cup (1 stick) unsalted butter, softened
1 cup sugar
1 large egg
1/2 cup milk
1 teaspoon pure vanilla extract
12 large marshmallows, cut in half horizontally

Chocolate Frosting for Surprise Cookies:

2 cups confectioners' sugar
4 tablespoons (1/2 stick) unsalted butter, melted and cooled
1/4 cup Dutch-process cocoa powder
1/4 cup milk
1/4 teaspoon pure vanilla extract

Place confectioners' sugar in a medium bowl. Whisk in butter and cocoa powder. Add milk and vanilla, and whisk until well combined.

Preheat oven to 375 degrees. In a medium bowl, whisk together flour, cocoa powder, baking soda, and salt; set aside.

Cream together butter and sugar until light and fluffy, about 2 minutes. Add egg, milk, and vanilla, and beat until well combined. Add reserved flour mixture; mix on low speed until combined.

Using a tablespoon or cookie scoop, drop dough onto ungreased or lined baking sheets, about 2 inches apart. Bake until cookies begin to spread and become firm, 7 to 9 minutes.

Remove baking sheets from oven, and place a marshmallow, cut-side down, in the center of each cookie, pressing down slightly. Return to oven, and continue baking until marshmallows begin to melt, 2 to 2 1/2 minutes. Transfer cookies to a wire rack to cool completely before frosting.
Spread about 1 tablespoon of frosting over each marshmallow, starting in the center and continuing outward until marshmallow is covered.

Monday, February 13, 2012

Brownie Roll-Out Cookies

The Thursday before Valentine’s Day I realized I had no heart cookie cutters.  Uh-oh.  Luckily my wonderful husband didn’t balk at paying for extra-fast shipping so I could have them by this weekend.  Of course he knew what his reward would be, a batch of cookies baked up just in time for Valentine’s Day.

Roll-out cookies bring back memories of Christmas and rolling out sugar cookies with my Mom.  Those cookies were typical sugar cookies: crispy, buttery, perfect topped with some sprinkles and dunked in milk.  These cookies are the opposite of those, cakey and moist with a deep chocolate flavor.  I topped some with turbinado sugar to give them a bit of crunch which Dennis said he appreciated.  The best thing about this recipe is that it’s adaptable for any holiday (or lazy weekend).  Happy Valentine’s Day!

Brownie Roll-Out Cookies (adapted from Smitten Kitchen)

3 cups all-purpose flour
1/2 teaspoon salt
1/2 teaspoon baking powder
1 cup butter, softened
1 1/2 cups sugar
2 large eggs
1 teaspoon vanilla extract
2/3 cup unsweetened cocoa
Turbinado sugar or sprinkles (optional)

Whisk dry flour, salt and baking powder in bowl and set aside. Mix butter, sugar, eggs, vanilla and cocoa in mixer. Gradually add flour mixture, and mix until smooth. Wrap in plastic and chill for at least one hour.

Preheat oven at 350 degrees. Roll out cookie dough on floured counter or Silpat (I found rolling it out on the Silpat much easier – you just have to do the dough in batches to fit it on the mat). Cut into desired shapes.  Top cookies with turbinado sugar or sprinkles if you so desire.  Bake on a lined baking sheet for 8 to 11 minutes, until the edges are firm and the centers are slightly soft and puffed.

Transfer to a wire rack to cool.

Saturday, January 28, 2012

Granola S'mores Bars


It's easy to look through my past posts and see a theme with many of them. Any recipe that incorporates marshmallows and chocolate is put at the top of the to-do pile, and usually with great results. This week's recipe was no different.

The recipe takes the basic elements of s'mores but puts them into an easy to eat treat, no campfire required. The addition of oats gives the bars a nice crunch and also helps balance the sweetness of the marshmallows. I'm always a bit nervous bringing my treats into work (such pressure!) But these went over like gangbusters. Not only were all the bars eaten by the second day, but my boss said they were one of his favorite treats that I've brought in. I hope he remembers that when it's time for my yearly review.

Granola S'more Bars (from King Arthur Flour Baking Companion)

6 tablespoons unsalted butter
1/4 cup firmly packed brown sugar
6 tablespoons golden syrup
2 1/4 cups rolled oats
1/2 cup flour
1/2 teaspoon salt
1 cup graham cracker crumbs
1 cup semi-sweet chocolate chips
1 1/4 cups mini marshmallows

Preheat oven to 350 degrees.

In a medium saucepan over medium heat, melt and stir together the butter, sugar, and syrup, cooking until the sugar has dissolved.  Stir in oats, flour, salt and graham cracker crumbs.

Press about 3/4 of the mixture into a lightly greased 9x9 pan.  Let cool completely.  Sprinkle the chocolate chips evenly over the top, then the marshmallows.  Top with remaining crust mixture.  Bake the bars for 15 to 20 minutes.  Remove from the oven and let them rest for 20 minutes, then cut into squares while still slightly warm.

Monday, January 16, 2012

Chocolate Raspberry Thumbprints

I’ve mentioned numerous times that Dennis loves raspberry and chocolate (Exhibits A,  B, and C).  And originally I was planning to make a lighter treat this week to welcome in the New Year and help us recover from gorging on Christmas cookies.  But then I came across this recipe for Chocolate Raspberry Thumbprint cookies and I put my “healthy” plans to the side.  There’s always next week, right?

I’m not the biggest fan of chocolate (blasphemy, I know) but even I had to admit these cookies were insanely good.  The actual cookie was so fudgy it resembled a brownie more than a cookie.  The raspberry preserves helped balance the sweetness of the cookies and you were left with one killer flavor combination.  I’ve already been instructed to add these to the “Must Make Again” list. 

Chocolate Raspberry Thumbprints (Adapted from All American Cookie Book)

6 ½ ounces bittersweet or semi-sweet chocolate, broken up
1 stick unsalted butter
2/3 cup sugar
3 large eggs, room temperature
1 ½ teaspoons vanilla extract
2 tablespoons raspberry preserves
1 ¾ cups flour
3 tablespoons unsweetened cocoa powder
¼ teaspoon baking powder
¼ teaspoon salt
1 cup semisweet chocolate chips

In a large, microwave safe-bowl, microwave the bittersweet or semi-sweet chocolate and butter on full power for 1 minute.  Stir well.  Continue microwaving on 50% power, stirring at 30-second intervals.  Stop microwaving before the chocolate completely melts and let the residual heat finish the job.  Let cool to warm. 

Stir the sugar into the chocolate mixture until well blended.  Using a spoon beat in the eggs, one at a time.  Stir in the vanilla.  In a small microwave-safe bowl, heat the 2T raspberry preserves on 50% power until just fluid, about 1 minute.  Stir the preserves into the chocolate mixture and set aside.

In a medium bowl, stir together the flour, cocoa powder, baking powder, and salt.  Add the flour mixture and chocolate chips to the chocolate mixture and stir just until well blended.  Refrigerate the dough for at least 1 ½ hours or up to 8 hours. 

Preheat the oven to 325.  Line several baking sheets or coat with non-stick spray.

Use a cookie scoop to shape balls of dough, then place on the cookie sheets.  Press a well into the center of each ball and place about ¼ teaspoon of preserves in each well. 

Bake the cookies for 7 to 9 minutes, or just until they feel firm when pressed in the centers.  Transfer the sheet to a wire rack and let stand 3 to 4 minutes.  Transfer the cookies to a wire rack.

Saturday, December 31, 2011

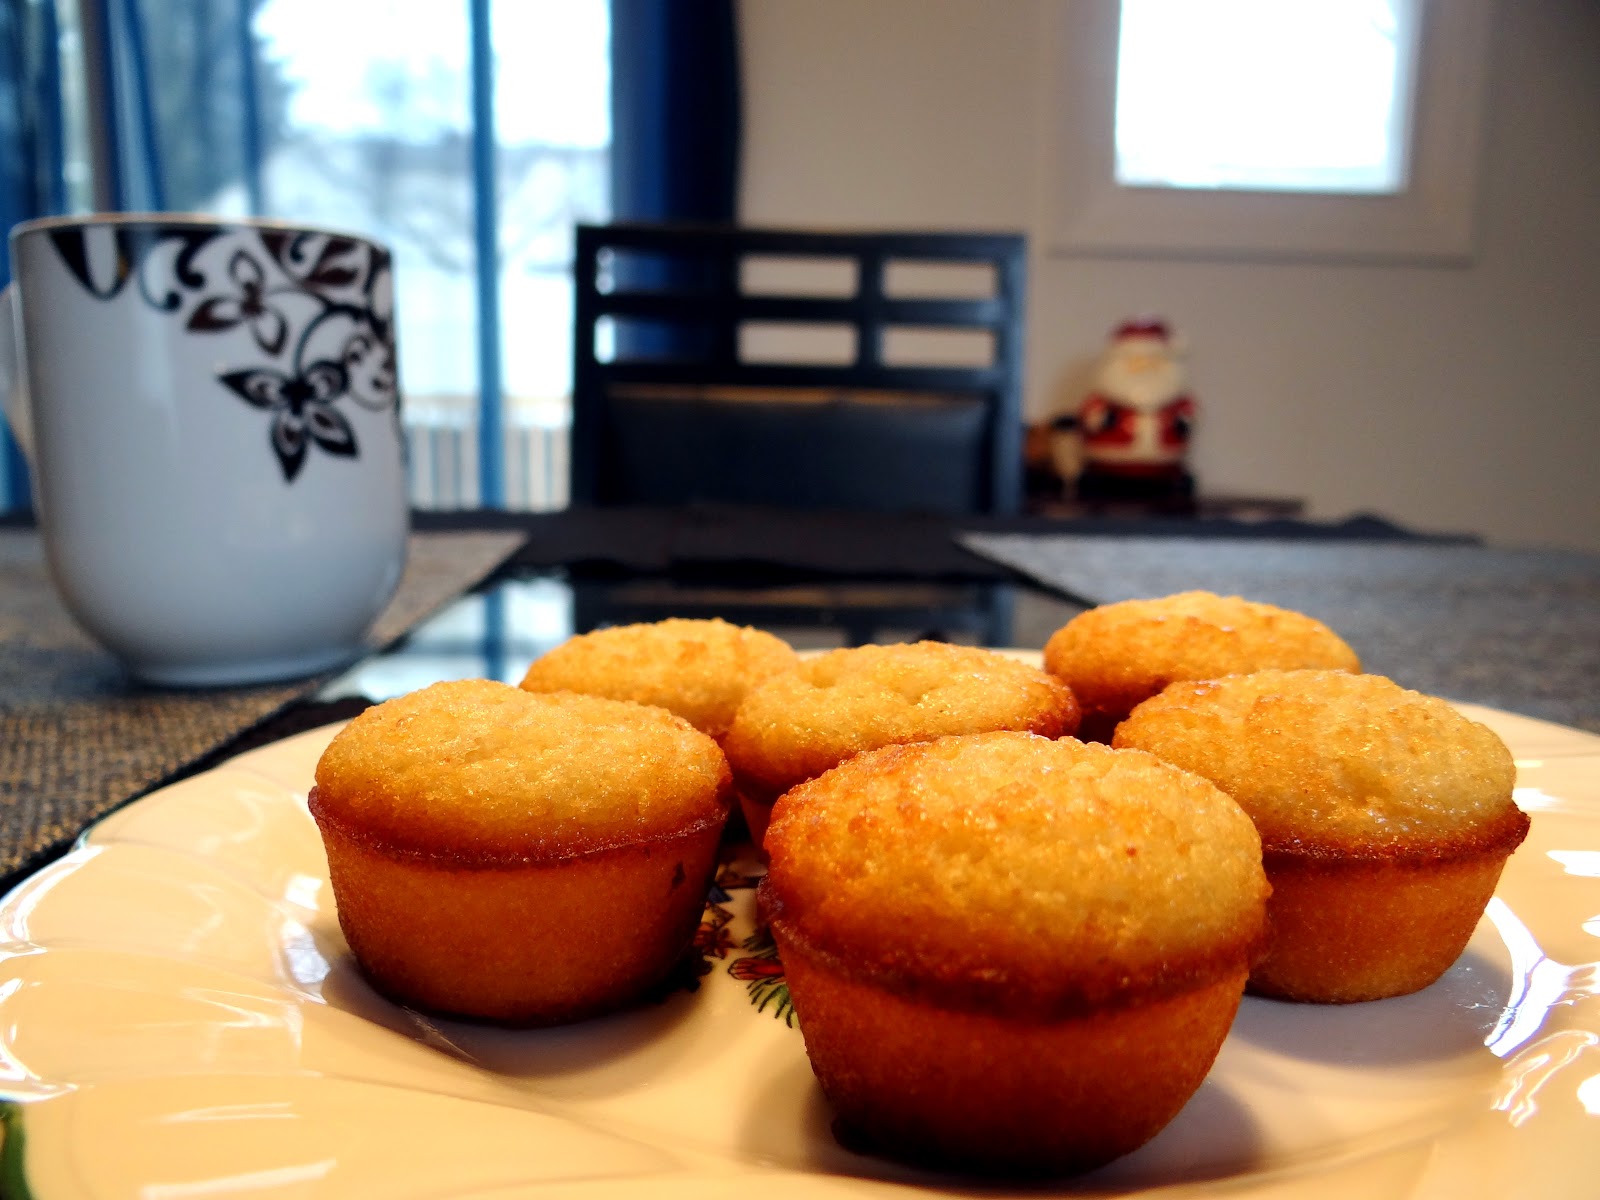
Mini-Muffin Financiers


I had never even heard of financiers until Dennis discovered a spot near his office that gives them away with each cup of coffee.  Financiers are small French cakes, not too sweet and perfect for breakfast.  Dennis has been requesting a homemade version for a few months now so I decided that could be his Christmas morning treat.  I was worried that the recipe would be too involved but it’s actually quite simple.  You just have to plan ahead as the batter needs to sit for a few hours before you can bake it up.  I just whipped up the batter the night before, then baked up a few financiers each morning.  There are apparently special financier pans but I found a recipe using a mini-muffin pan.  I really need another baking pan like I need another hole in the head.  

These got two enthusiastic thumbs up from Dennis.  The original recipe calls for placing a raspberry on top of each before baking but since it’s December I left that out.  I’m looking forward to baking up batches in the summer topped with fresh berries.  A few of those and a good cup of coffee and I can almost pretend like I’m back in Paris.


Mini-Muffin Financiers Recipe (from Leite’s Culinaria)

8 tablespoons (1 stick) unsalted butter, plus, plus more for the pan
1 cup confectioners sugar 
1/2 cup almond flour 
6 tablespoons all-purpose flour 
1/4 teaspoon baking powder
5 large egg whites, lightly beaten, at room temperature
1 teaspoon honey
1/4 teaspoon vanilla extract

In a heavy pan over medium heat, warm the butter until it melts and the milk solids settle and stick to the bottom of the pot and turn golden brown and slightly caramelized, about 7 minutes. Remove from the heat and let cool.

Sift the confectioners’ sugar, almond flour or ground almonds, all-purpose flour, and baking powder into the bowl of an electric mixer fitted with the whisk attachment. Mix on low speed, then add the egg whites, honey, and vanilla, and mix on low speed, scraping down the bowl, until combined. Add the cooled melted butter and their solids and mix until incorporated. Cover the bowl and refrigerate for at least 2 hours or overnight. (You can actually keep the batter in the fridge, at the ready, for up to several days.)

When you’re ready to bake the financiers, position a rack in the center of the oven and preheat to 400°F. Butter a 12-cup mini muffin tin. Fill each muffin cup about two-thirds full of batter. Bake on the center rack until golden brown around the edges and firm in the center, about 14-16 minutes.

Let the financiers cool in the pans for 5 minutes then run a thin knife or offset spatula around the sides of the muffin cups or financier molds. Turn the financiers out onto wire racks. Serve warm or let cool on the rack and serve later that same day.